Automation Recipes (Introduced in 3.0)
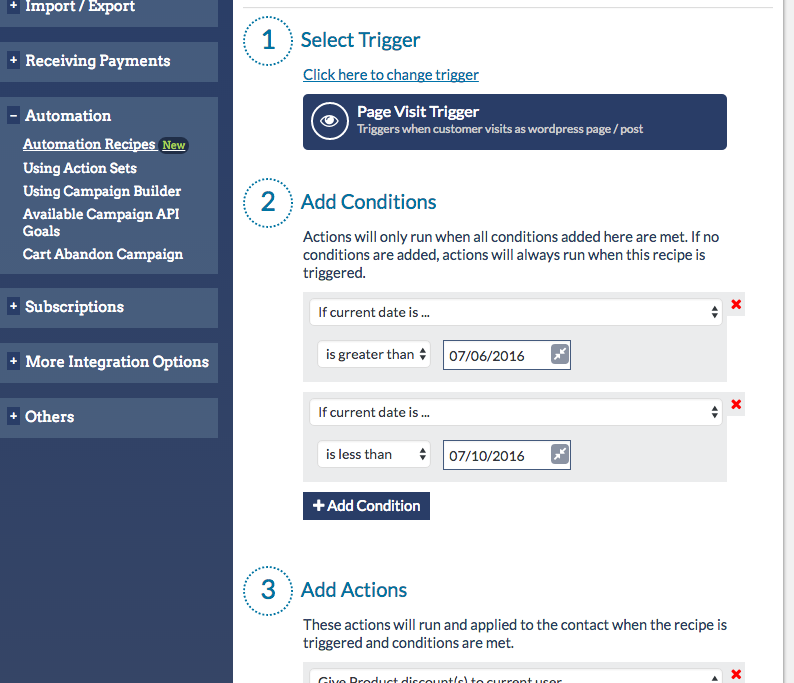
Automation Recipes feature is a better, flexible and a more powerful way to automate processes in your ecommerce site. It is also easy to create an automation recipe, just specify the (1) Trigger, (2) Conditions and (3) Actions, save the recipe then you’re done and the recipe will automatically run as configured.
Here are some example cases where automation recipes are handy:
- Sending a personalized coupon code to the customer upon successful purchase.
- Automatically mark orders complete if ordered items are non-shippable items.
- Running a site-wide sale.
- Free shipping if customers are logged-in to your website.
- Sending Birthday Coupon code to the customer.
1. Select your Trigger
You can access Automation Recipes by going to Automation -> Automation Recipes in InfusedWoo 3.0. To create a new recipe, click on “Create New Recipe” button.
Then select your trigger.
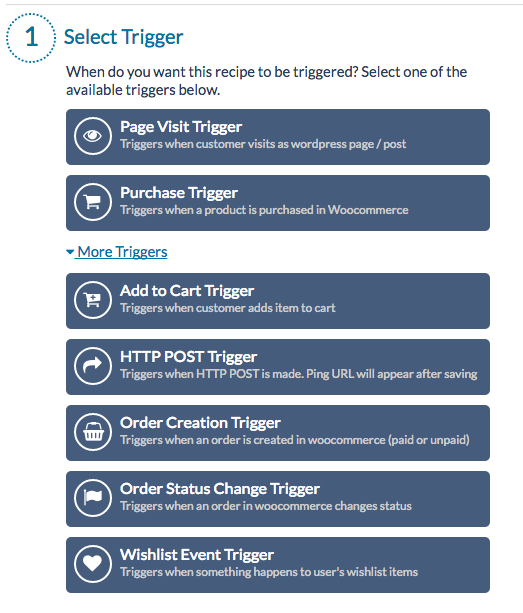
The choice of selecting the trigger depends on what you want to automate. For example, if you want to run something after the customer purchases something in woocommerce, you should use Purchase Trigger. If you want to run actions when a customer visits a webpage in your wordpress site, then you should use Page Visit Trigger.
Order Creation trigger is handy if you want to run action for Bank deposit payments or cheque payments where payment is not yet approved as the Purchase Trigger only runs action when the payment is completed.
You can also run actions if an item is added to cart or when the user adds item to their wishlist items (if you are using Woocommerce Wishlists Plugin).
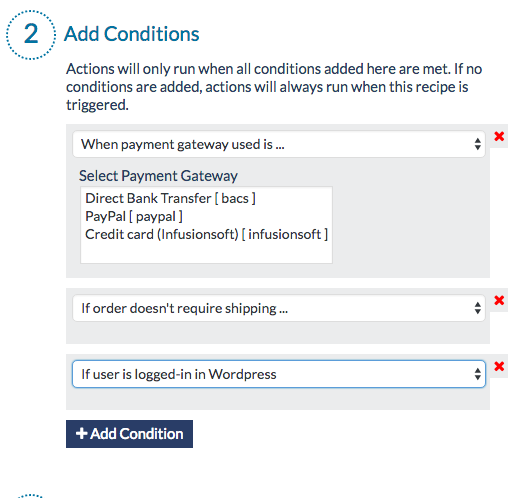
2. Add Conditions
Once you have added your trigger, you can add conditions so that actions will only run if all conditions are met. If you do not add conditions, then the actions will always be run. For example, if you have chosen Purchase Trigger and you haven’t added any conditions, then the actions will always run when someone purchases in woocommerce.
There are many different conditions and the available conditions depend on the trigger you have chosen. For example if you are using Purchase Trigger. You can add conditions based on the products that customer has purchased. You can also add condition to check if the customer have some tags in Infusionsoft.
For Page Visit Trigger, you can add condition to check the page they are viewing. This is handy if you want to run marketing emails if they viewed some products in your shop.
3. Add Actions
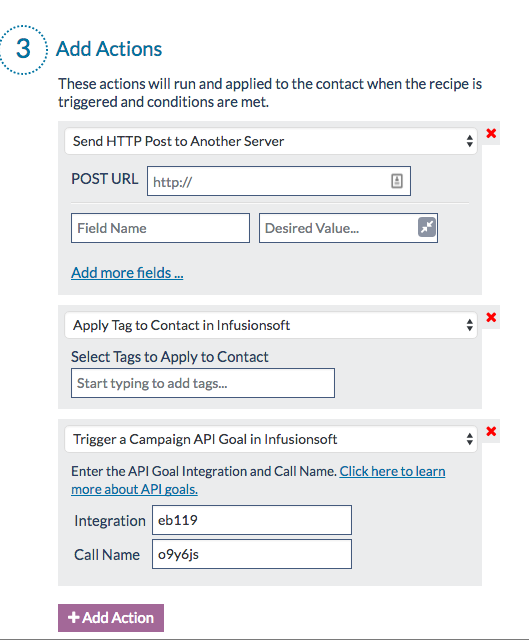
Lastly, add actions you want to run. You can apply tags, send emails, trigger campaign goal in API. You can also generate a coupon code, update contact record in Infusionsoft and user in wordpress.
Once you’re done adding actions, enter a Recipe Title and save the recipe. Once the Recipe is saved, then it is ready and active and it will run as configured.
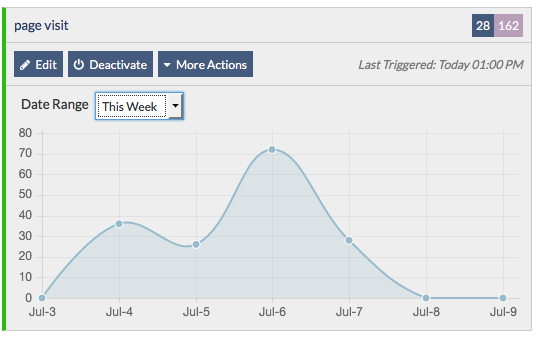
Viewing Recipe Stats
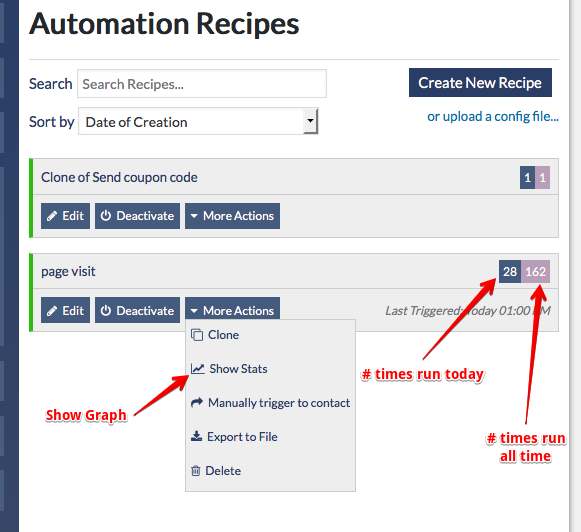
In the main page in Automation -> Automation Recipe, you will see numbers in the right side of the recipe. The number in the left side (blue) is the number of times the recipe was triggered within the current day while the other number (right side) show the number of times the recipe was triggered since the recipe was created.
You can also get more detailed stats by clicking on More Actions –> Show Stats in the recipe. It will show a graph showing the trend or the number of times it is triggered on certain days. The y-axis is the number of times the recipe is triggered, and the x-axis is the date.