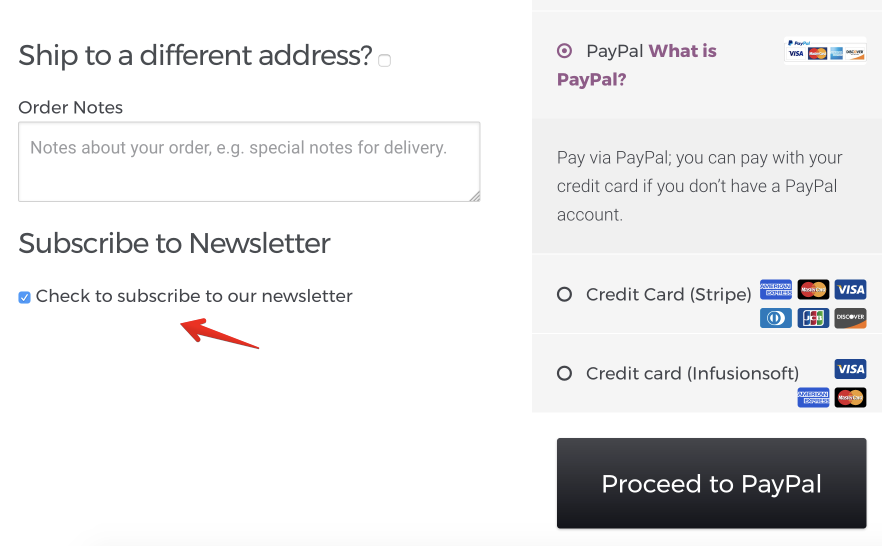
One of the best ways to capture customers who wants to receive your product newsletters and marketing emails is to put a checkbox on your site checkout to ask them if they want to receive marketing emails.
Note that people who purchased product in your shopping site doesn’t necessarily mean that it is fine to send marketing emails to these customers. In fact, email marketing companies like Infusionsoft strictly prohibits sending marketing emails to people who made purchases if they didn’t sign-up to receive your newsletters.
While Infusionsoft strictly doesn’t allow this, you don’t see a way to put newsletter signup checkbox to their native shopping cart module. Still it is important to do this to comply with different countries’ E-commerce standards and also to send marketing emails to people who are genuinely interested to your newsletter and emails.
So let’s do it right! If you are using Woocommerce and InfusedWoo, the good news is you can easily do this without touching any codes. Here’s how you can do it in 6 steps.
1. Create a custom contact field in Infusionsoft for Newsletter Signup Checkbox
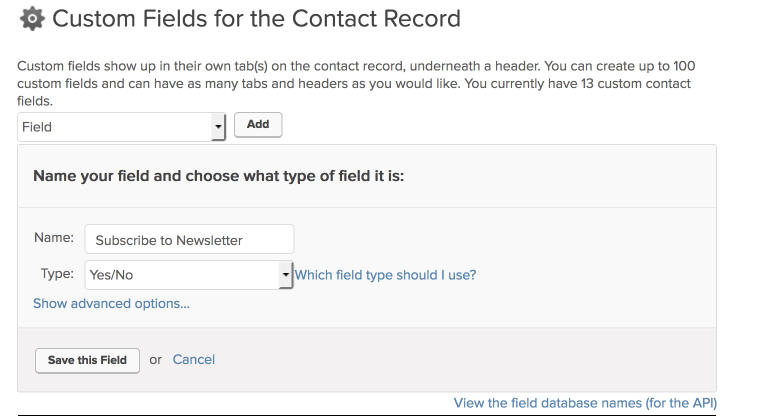
Log-in to your Infusionsoft App and go to Admin > Settings. Under Custom fields, make sure the dropdown is set to ‘Contact’ and click ‘Go’ button.

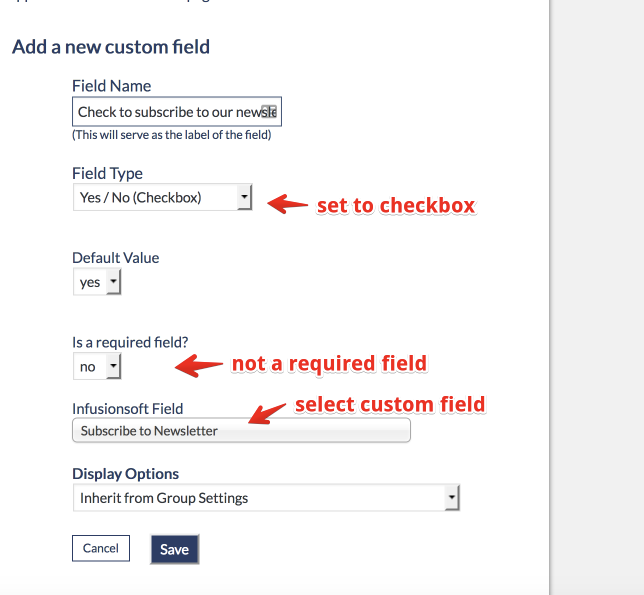
Then create a new custom field. Set the field name to a desired name. In my case, I simply entered ‘Subscribe to Newsletter’. Set the field to a Yes/No field (this is very important). Then save the field.
2. Create a Campaign for the Newsletter Sign-Up
Go to Marketing > Campaign Builder and create a new campaign. Name the campaign to a desired name, in my case I used ‘Sign-up to Newsletter Campaign’.
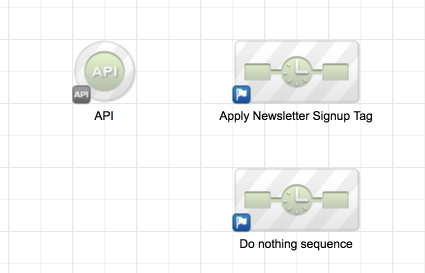
Then add an API goal and set this to InfusedWoo’s standard purchase API goal setting: Integration: woopurchase, Call Name: any

Then create two campaigns, one campaign for applying the Newsletter Tag. The Newsletter Tag will allow you to identify contacts in Infusionsoft who are interested in getting the newsletter. If you haven’t created a tag yet, create a tag in Infusionsoft > CRM > Settings > Tag.
The other campaign is a blank campaign and will not do anything. This is only to “catch” people who do not want to receive the newsletters.
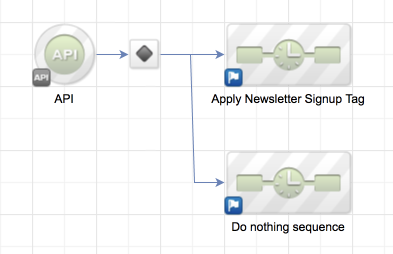
Connect the API goal to these two sequences and a decision diamond will appear:
 .
.
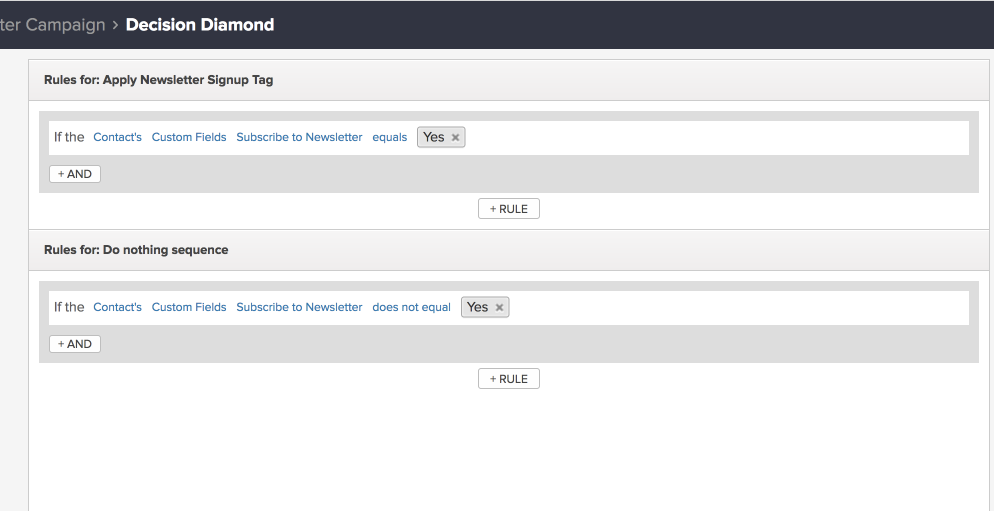
Double click the decision diamond to edit its logic. Set the rule on the top to only allow if Contact’s Newsletter Sign Up custom field is equal to Yes. And the rule on the bottom to Contact’s Newsletter Sign Up custom field is not equal to Yes. It should look like this:
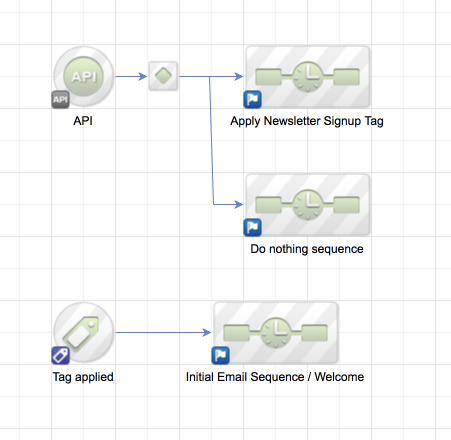
Additionally, if you want to send a welcome email sequence, you can add a sequence below and use a tag trigger (where the tag is the Newsletter Sign Up tag you created before). And your whole campaign will look like this:
Publish the campaign.
3. Add a custom checkout field in InfusedWoo
Log-in to WordPress and go to InfusedWoo > More Integration Options > Checkout Custom Fields.
Create a field group if you haven’t created one yet. Then under that field group, click the + icon to create a new custom field.
Then enter a custom field name (this will appear next to the checkbox). Then set the field type to Yes/No (Checkbox). And under Infusionsoft Field, select the Newsletter Custom Field you have created in Step 1.
Save and the field will appear in the checkout page.
For more info about InfusedWoo. Click here.
For any questions, contact our team at infusedaddons.com/support