Birthdays are one of the best times to send a personalized coupon codes to your customers.
- People are more willing to do shopping during their birthdays than ordinary days.
- Personalized coupon codes are recognized as gifts when sent during someone’s birthday. On other days, people can treat coupons as a general sales promotion. People are more willing to spend if coupon codes are sent as a gift.
- If personalized coupon codes are set to expire after 24 hours or few days, it will be more likely that the user will take advantage of the coupon code and use it to buy your products.
To implement this, you only need two things
1. An automation recipe in InfusedWoo with HTTP POST Trigger and actions to generate a woocommerce coupon code and save the coupon code to an Infusionsoft contact custom field.
2. A campaign in Infusionsoft that will be triggered during customer’s birthday and will run an HTTP Post call to InfusedWoo’s automation recipe to create the coupon code.
PREP 1: Create a Coupon Template in Woocommerce
The automation recipe will need a coupon template for the coupon code generation as InfusedWoo will copy the coupon properties (such as percent discount) from this coupon template.
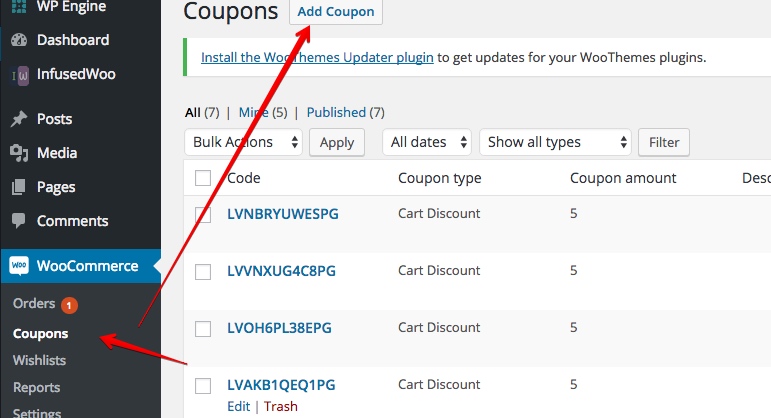
In WordPress, go to Woocommerce –> Coupons and create a new coupon by clicking on “Add Coupon”.
 

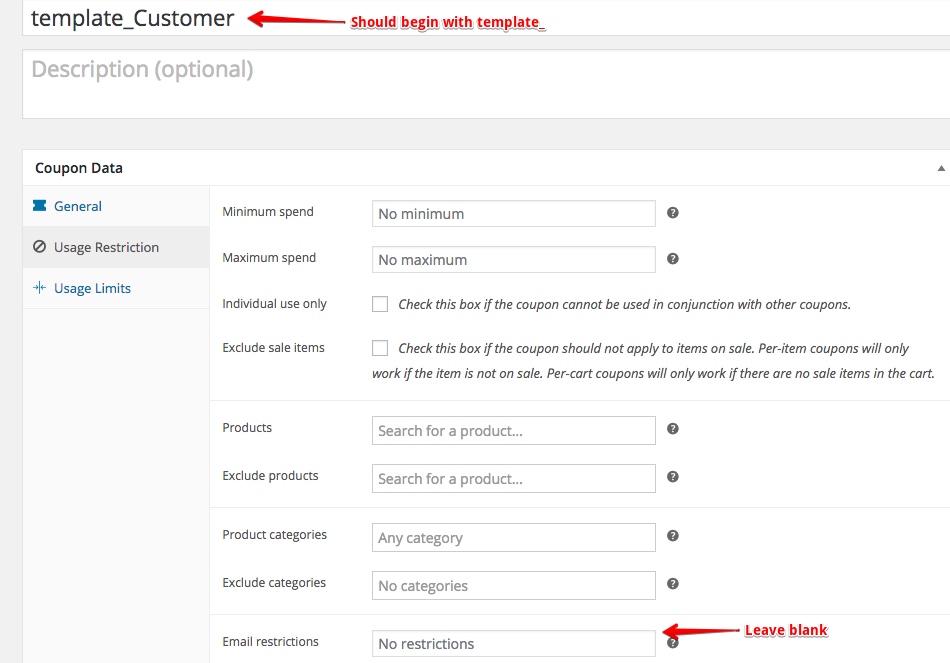
To create a new template, the coupon code name should begin with “template_”. Configure the coupon code like creating an standard woocommerce coupon code. If you only want to limit the usage of the coupon code, specify this in the usage limit section. E.g. if you only want to limit the usage of this coupon to 1, then enter this under “Usage limit per coupon”. Leave “Usage limit per user” empty if you don’t want customers to share the coupon code to other users.
Also leave the “Email restrictions” box empty in Usage Restrictions tab as this will be overridden by InfusedWoo.

PREP 2: Tag and Custom Field in Infusionsoft
There are few things that needs to be done in Infusionsoft. First we have to create a tag the following tags:
- “Birthdate Collected” Tag – use this tag to identify users who have provided their Birthdate. It is important to apply this tag the moment you have collected their birthdate (e.g. via Webform or Woocommerce Checkout – you can collect customer’s birthdate by using InfusedWoo’s Checkout Custom Fields, InfusedWoo > More Integration Options > Checkout Custom Fields.)
- “Birthday Coupon Sent” Tag – this tag will identify contacts that have received the Birthday Coupon.
Second is to create or assign a custom field to hold the coupon code value in Infusionsoft.
To create a tag in Infusionsoft, follow this guide{:target=”_blank”}.
To create a custom field in Infusionsoft, follow this guide{:target=”_blank”}. Make sure the custom field is of text field type.
InfusedWoo Automation Recipe
Now it’s time to create the automation recipe. Go to InfusedWoo > Automation > Automation Recipes and create a new Recipe.
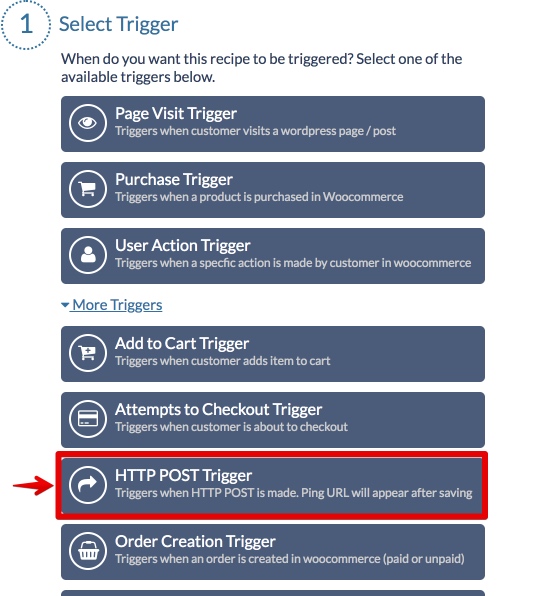
Select the Trigger: HTTP POST Trigger (under More Triggers):

Leave the conditions step empty.
Under actions, add these actions:
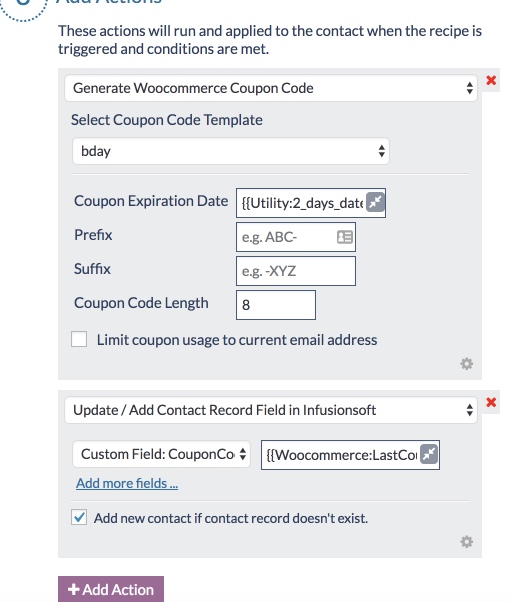
* Generate Woocommerce Coupon Code. Then select the Coupon Code template. Under coupon expiration date, you can set this to e.g. {{Utility:2_days_date}} if you would like the coupon to expire 2 days from the date it is generated. You can change the number of days by changing the number “2” in the merge field.
* Update/Add Contact Record Field in Infusionsoft. On the left side select the custom field you have created that will store the coupon code. On the right side, enter {{Woocommerce:LastCouponCode}} (or click the merge field icon and select Woocommerce > Last Generated Coupon Code)

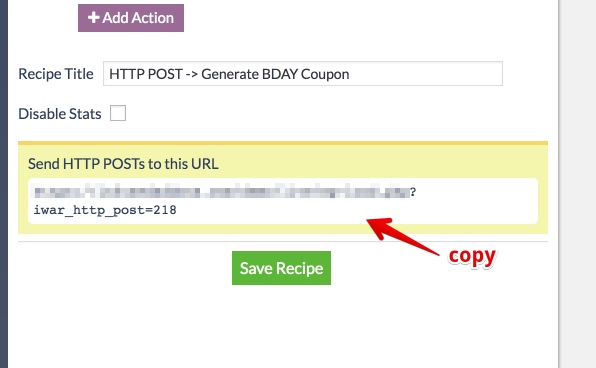
Enter a Recipe Title and save the recipe. An HTTP POST URL will appear at the bottom. Copy the HTTP POST URL as this will be used in the campaign (next step).

Infusionsoft Campaign Builder
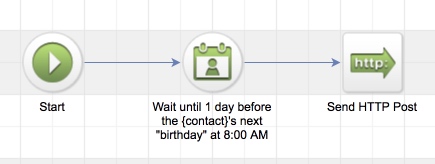
Design your campaign builder like this:
Tag Goal –> Sequence 1 –> Sequence 2 –> Sequence 3. (See below)
 

When the Birthdate is collected, the first sequence will be triggered. The first sequence will wait until the customer’s next birthday and will generate a new coupon code just before the customer’s birthday. The second sequence will then send the coupon code and the third sequence will wait for some time (e.g. 30 days) and will reset the campaign so the user will go back to sequence 1 again.
Configure the Tag Goal to trigger when the “Birthdate Collected” Tag is applied.
Sequence 1. Generate Coupon Code should look like this:

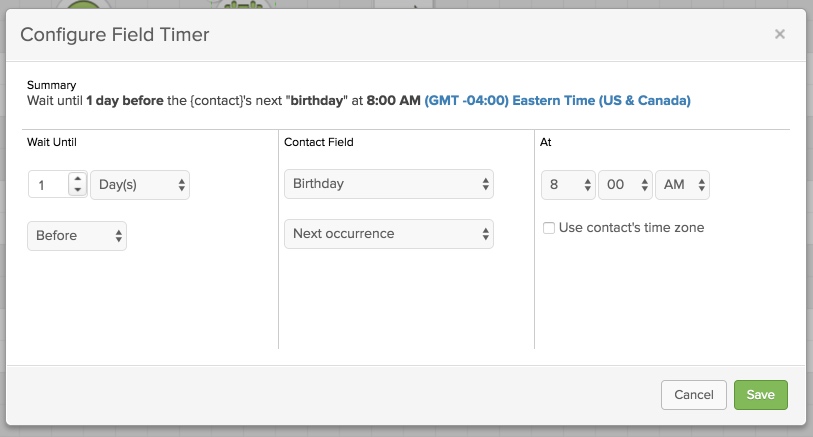
Inside the sequence is a Field Timer and HTTP POST Action.
Field Timer Settings:

HTTP POST Settings:
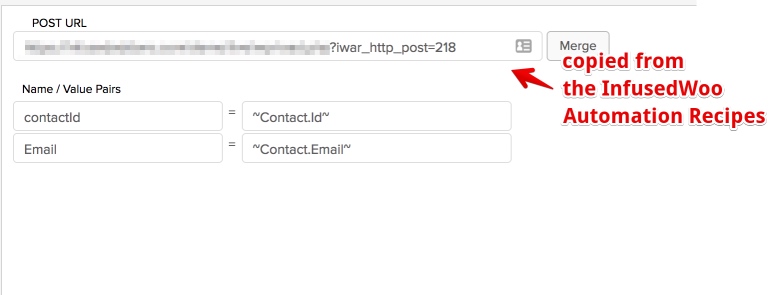 

Notes: The POST URL is the HTTP POST URL you have copied after creating the automation recipe in InfusedWoo. It is important to pass both contactId and Email parameters.
Sequence 2. Send Coupon Code sequence should look like this:
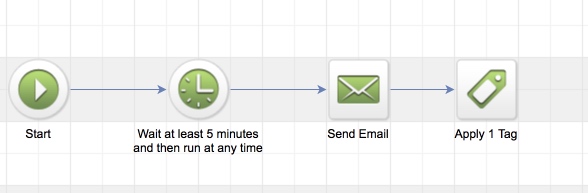 

We added some delay timer so that there is a space between coupon code generation and sending of email (as there is a possibility that the email will be sent before the coupon is generated because of server delays).
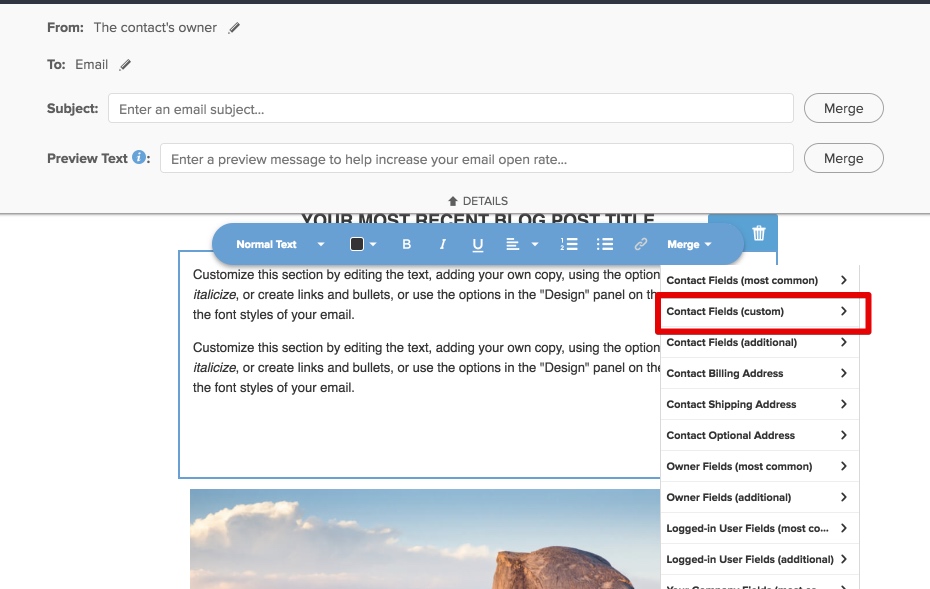
Edit the email action and write the email content as desired – e.g. birthday greetings, here’s your gift coupon code, etc. To enter the coupon code merge field, select Merge > Contact Fields (custom) (see below) and select the custom field you have assigned to store the coupon code.

In this sequence also, add an action to apply the tag “Birthday Coupon Sent”. This will identify that the user received the coupon code.
Sequence 3. Reset sequence should look like this:
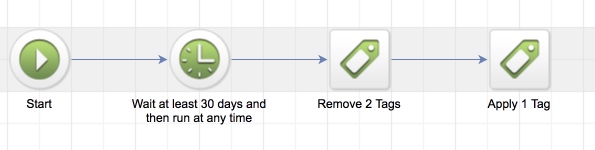 

This is a straightforward sequence to reset the campaign and put back the contact to sequence 1 (and wait again for the next birthdate). This sequence will remove the “Birthdate Collected” and “Birthday Coupon Sent” and re-apply the “Birthdate Collected” tag. Re-application of this tag will re-trigger the tag goal in the beginning of the campaign.