One of the best ways to increase repeat purchases is to give incentives when they purchase your product. According to a survey, customers are almost twice more likely to purchase again a product from your shop if they are given a discount coupon.
Usually static coupons are used (e.g. Coupons that doesn’t expire and has infinite number of usages) but this is not advised as coupons can be easily passed publicly to other users and can be used by users who are not eligible to use the coupon code.
In this guide, you learn know how to auto-generate a personalized coupon code for the customer right after they have purchased in your shop and limit the usage of the coupon for that specific user.
1. Create a Coupon Template in Woocommerce
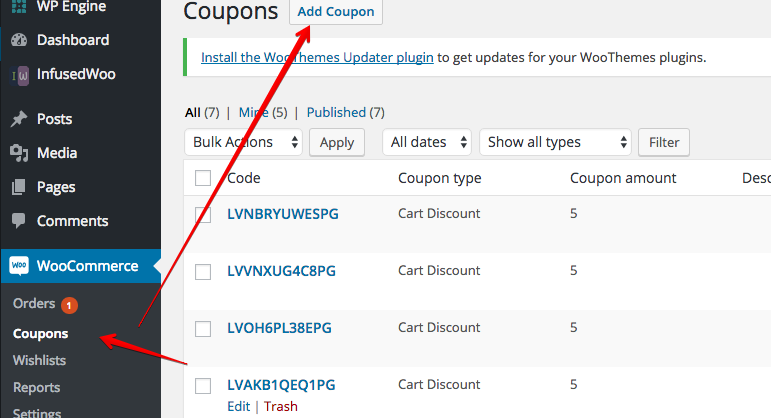
In WordPress, go to Woocommerce –> Coupons and create a new coupon by clicking on “Add Coupon”
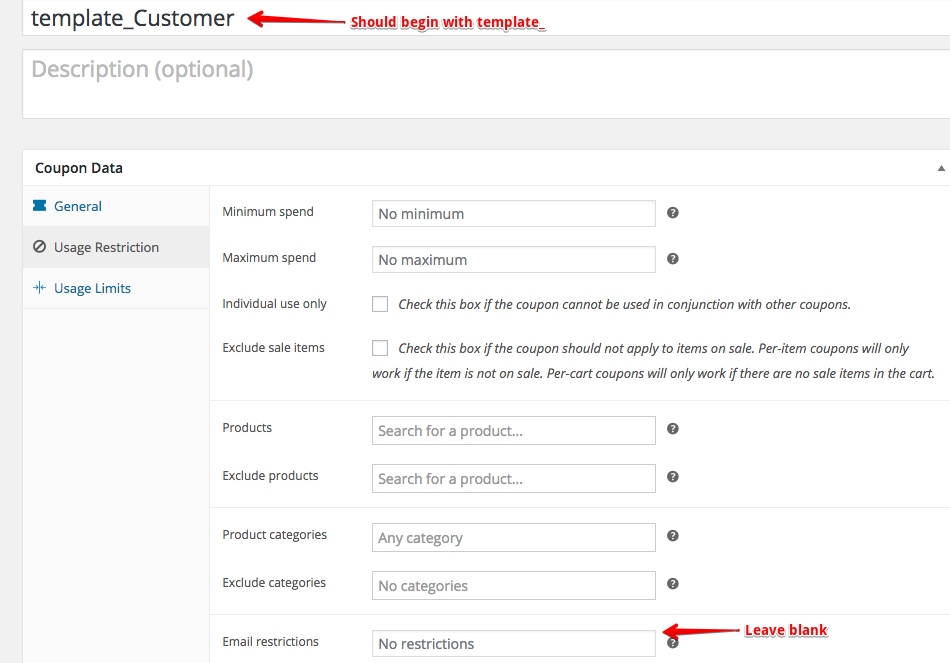
To create a new template, the coupon code name should begin with “template_”. Configure the coupon code like creating an standard woocommerce coupon code. If you only want to limit the usage of the coupon code, specify this in the usage limit section. E.g. if you only want to limit the usage of this coupon to 1, then enter this under “Usage limit per coupon”. Leave “Usage limit per user” empty if you don’t want customers to share the coupon code to other users.
Also leave the “Email restrictions” box empty in Usage Restrictions tab as this will be overidden by InfusedWoo.
2. Create a Tag and Email template, Assign Custom Field in Infusionsoft
There are few things that needs to be done in Infusionsoft. First we have to create a tag so we can identify customers who have already received the coupon, second is to create or assign a custom field to hold the coupon code value in Infusionsoft. And lastly, to create an email template to send to the customer so they will get their personalized coupon code.
To create a tag in Infusionsoft, follow this guide.
To create a custom field in Infusionsoft, follow this guide. Make sure the custom field is of text field type.
To create an email template in Infusionsoft, follow this guide.
Please note to get the merge field of the coupon code custom field you just created, you can obtain this in the email template toolbox –> Insert –> Merge Fields –> Contact Fields (Custom)

3. Create an automation recipe in InfusedWoo
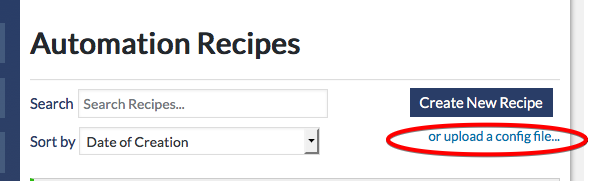
Go to Automation -> Automation Recipes in InfusedWoo. Create a new recipe or download this Recipe file (Alt + Click in Win or Option + Click in Mac to download) for easier creation.
Click on Upload Config file to create recipe from config file. Then select the downloaded .conf file.
4. Configure Recipe and Save
Make sure the Purchase Trigger is set as the trigger.
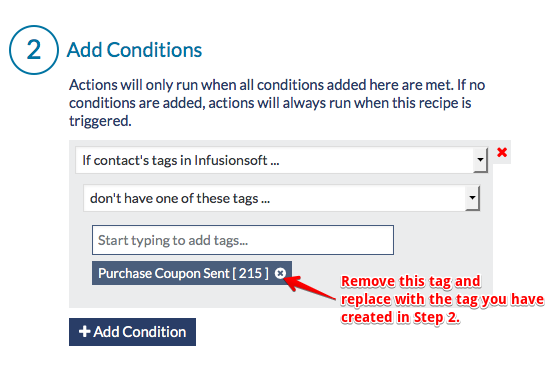
In the conditions, change the tag with the tag you created in step 2. You can freely add more conditions here as desired.
Then in the actions, the sequence is:
1. Generate a Coupon Code
2. Apply Tag to Contact
3. Save Generated Coupon code to Custom field in Infusionsoft
4. Send Email containing the Coupon code.
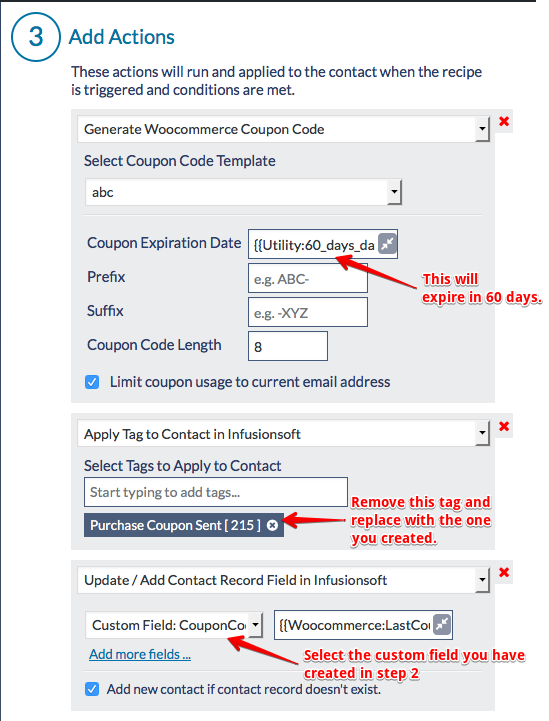
To configure the actions, first select the correct template in the coupon code generation action with the one you created. You can set the expiration day to 60 days from the date of creation (using InfusedWoo merge field). If you want to change the expiration to 30 days, then change ’60’ to ’30’. You can also make this field empty if you don’t want the coupon to expire.
Replace the tag in the tag action with the actual tag you have created in Step 2. Likewise, change the custom field and the email template with the ones you have created in Step 2.
Save the recipe.
I need help to add coupon code. I have gone through this tutorial https://www.cloudways.com/blog/create-woocommerce-coupon-code/ and implemented the same steps that mentioned in this tutorial but I am having an error when I add coupon it’s saying the coupon is not valid. Can you please tell me any alternative to do this? Here is my code
add_action( ‘woocommerce_before_cart’, ‘sh_coupons_matched’ );
function sh_coupons_matched() {
global $woocommerce;
$sh_coupon = ‘OnlineShop’;
if ( $woocommerce->cart->has_discount( $sh_coupon ) ) return;
foreach ( $woocommerce->cart->cart_contents as $key => $values ) {
$autocoupon = array( 65 );
if( in_array( $values[‘product_id’], $autocoupon ) ) {
$woocommerce->cart->add_discount( $cw_coupon );
wc_print_notices();
}
}
}
@Alvina, did you add your coupon code “OnlineShop” inside wordpress?