Using infusionsoft as webform will give you more flexibility in terms of information you want to gather from your visitors. It allows you add add custom fields and also design the form using Infusionsoft’s web form builder. Follow the steps below to setup this up.
1. Add a Contact Custom Field: Navigate to Custom Field settings.
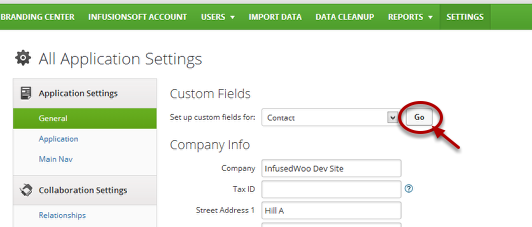
First, we need to create a custom field to store your user’s initial password. Log in to your Infusionsoft account, hover to the Infusionsoft’s Menu and go to Admin → Settings. Then under General Settings, Custom Fields, make sure the dropdown is set to “Contact” and then click Go.
2. Add the custom field.
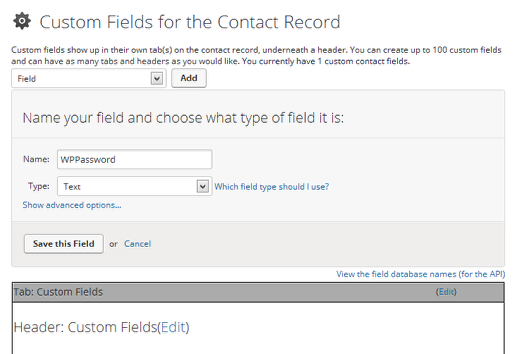
Next, add a custom field and use a descriptive name for this field. In this example, I used “WPPassword”. Make sure the type is set to “Text”, then click “Save this Field”.
3-A. Create the Infusionsoft Web Form (with Password Field)
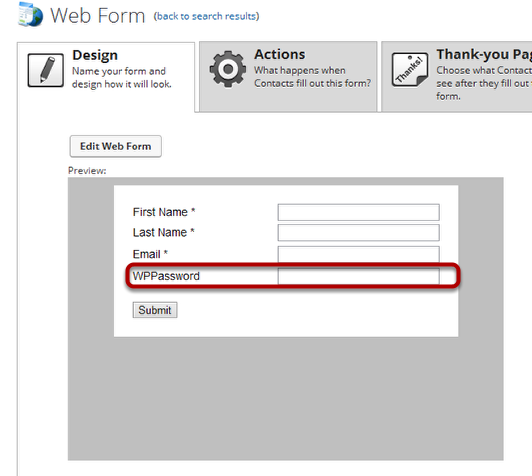
Once you already have the custom field, you can now create a web form. You can do this by going to Marketing → Legacy → Add Web Form. Alternatively, you can create this web form within a campaign using Infusionsoft’s campaign builder. When creating the web form, add the custom field you just created if you want your users to have a password they desire. However, if you don’t want them to have their own password, refer to step 3-B.
3-B. Create the Infusionsoft Web Form (automatically generate password)
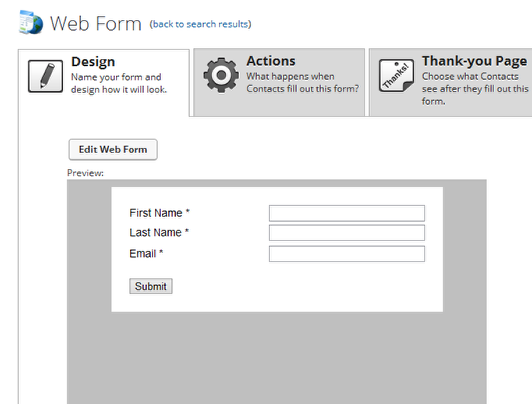
On the other hand, if you want to generate a password for every user registration, simply omit the password field. When form is connected to InfusedWoo, InfusedWoo will automatically decide to generate a password to the new user. The generated password will be saved to the custom field right after form submission. Make sure to setup an email action after form submission to send them their login information to your website.
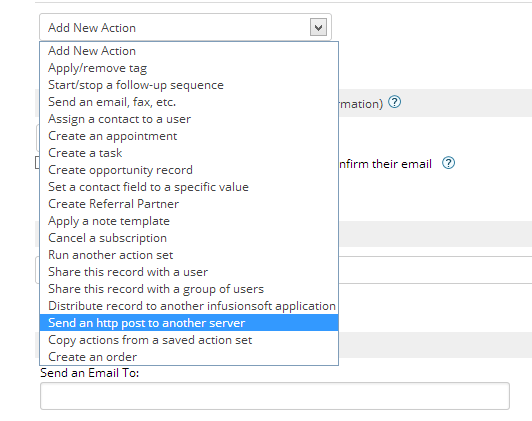
4. Set up HTTP Post in the form submission actions.
5. Set the HTTP Post URL
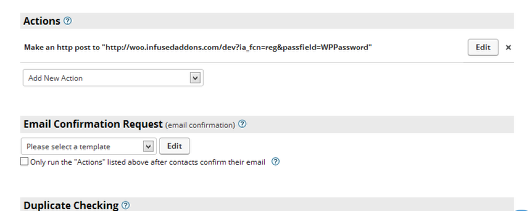
Set the HTTP Post URL as http://your-wordpress-url.com/?ia_fcn=reg&passfield={PasswordField}.
For example, in this website, the wordpress url is http://woo.infusedaddons.com/dev. And the password field is WPPassword.
This is the crucial step in setting up the registration form. Once this is done, the web form should communicate with your wordpress site and register new users.